Many homeowners across the United States are choosing panels that cut electricity bills and add long-term value. Lakisha Harris’s move into a solar-equipped house in Accokeek, Maryland, shows how rewarding a switch can be.
This short guide outlines the basics of a residential energy system and what to expect during installation. You will learn about initial cost, tax incentives, and likely savings over time. It is written for busy homeowners who want clear steps and realistic goals.
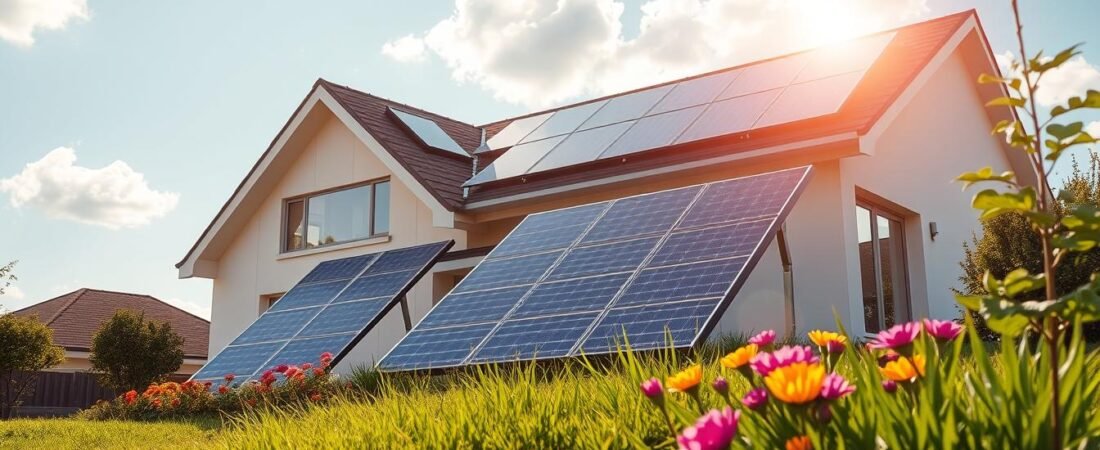
Before you begin, evaluate your roof and daily energy use to confirm your property suits a high-efficiency setup. For local service options and a professional review, check our trusted services page at solar installation services.
Going solar can lower bills, boost home value, and support a cleaner grid. This guide will walk you through the key choices and expected outcomes.
Understanding How to Get Solar Panel for Home
Choosing the right path starts with local research. The Solar Energy Industries Association reports the U.S. passed five million installations in 2024, which means more installers and clearer rules are available to homeowners.
Begin by checking recent electricity bills and speaking with your utility about net metering and interconnection rules. Next, compare companies on warranty, reviews, and equipment quality.
- Confirm roof condition and ideal system size based on average energy use.
- Review state programs and incentives that may lower upfront costs.
- Get at least three quotes to compare options and projected savings.
A clear comparison helps you pick a trustworthy installer and a durable setup that fits your budget.
| Step | What to Check | Benefit |
|---|---|---|
| Assess Usage | Monthly electricity and peak hours | Right-sized system |
| Inspect Roof | Age, orientation, shading | Optimal placement of panels |
| Compare Companies | Warranties, reviews, equipment | Long-term reliability |
The Fundamentals of Residential Solar Energy
Understanding the core mechanics of a residential energy system helps you choose the right size and equipment. Below are the basic principles that drive energy production and system design.
How Panels Generate Electricity
Panels make electricity through the photovoltaic effect. Silicon cells absorb sunlight and release electrons, producing direct current (DC).
An inverter then converts DC into alternating current (AC) so appliances can use the power.
Types of Power Systems
Most households pick from three setups: grid-tied, hybrid, or off-grid. Grid-tied systems rely on the utility and offer low cost and simple interconnection.
Hybrid systems add a battery for backup. Off-grid systems provide full independence but usually need more panels and storage.
| System Type | Typical Use | Notes |
|---|---|---|
| Grid-tied | Reduce bills, net metering | Lowest hardware cost |
| Hybrid | Partial backup, load shifting | Includes battery storage |
| Off-grid | Remote properties | Requires larger capacity and storage |
Sizing tip: the average U.S. installation is about 7.2 kW and often needs 15–19 panels. Adding a battery stores excess clean energy for night-time power.
For equipment comparisons and detailed guides, see solar panels for home.
Financial Considerations and Investment Costs
An honest cost forecast matters. A typical solar energy system for a U.S. residence runs about $18,000–$20,000 before incentives. Factor tax credits and state rebates into that price when you plan a budget.
Financing options can make the project doable. Many homeowners use solar loans to keep ownership while spreading payments. Compare loan terms and interest so monthly payments and total cost match your goals.
- Request at least three detailed quotes from different companies.
- Check warranty, installation price, and projected electricity savings.
- Learn your state’s net metering rules to estimate credit for excess power sent to the utility.
Long-term view: panels and a reliable system often cut bills and raise property value. With solid quotes and the right loan option, going solar can be a sound financial move that pays back over time.
Evaluating Your Property for Solar Potential
Assess sunlight exposure, roof condition, and local rules before you invest in a solar energy system. A clear look at these items helps predict energy production and long-term savings.
Key Factors for Roof Suitability
Orientation and tilt: A south-facing roof usually yields the best output. Roof angle affects year-round performance and peak power.
Shade and obstructions: Trees, chimneys, and vents cut production. Even small shadows can reduce the output of panels.
Structural integrity: Confirm decking, rafters, and shingles are sound. A weak roof adds cost and can delay installation.
Local utility and rules matter: Check if your utility offers net metering. That option lets excess electricity credit your bills and improves payback.
| Check | Why It Matters | Action |
|---|---|---|
| Roof orientation | Maximizes energy production | Map sun path; prefer south-facing sections |
| Shade | Reduces daily output | Trim trees or relocate arrays |
| Roof condition | Affects installation cost and timing | Repair or replace before install |
| Monthly bills | Shows potential savings | Compare cost vs. installation quotes |
Value and incentives: In many states, panels can raise property value. Also check local tax rules and incentives that lower upfront cost.
Navigating Solar Incentives and Tax Credits
Tax credits and utility rebates can make clean energy far more affordable for many homeowners.
The federal tax credit currently lets homeowners deduct 30% of the total installation cost from federal income tax in the year after the project. That deduction often cuts thousands from upfront costs and shortens payback time.
State and local incentives add extra savings. Many states and utilities offer rebates, low-interest loans, or performance payments that lower the total system price.
“Stacking federal credits with state rebates and net metering can change a lengthy payback into a realistic investment.”
Understanding net metering is vital. Under metering rules, your utility may grant credits for excess electricity that your panels send to the grid. Those credits reduce monthly bills and boost annual savings.
- Claim the 30% federal tax credit when filing the following year.
- Ask installers about state rebates, local incentives, and utility programs.
- Confirm net metering policies with your utility before signing a contract.
| Incentive | What It Does | Typical Benefit |
|---|---|---|
| Federal Tax Credit | Deducts a percentage of installation cost from taxes | Reduces upfront cost by 30% |
| State Rebate | One-time payment or rebate after installation | $500–$2,500 depending on state |
| Utility Program | Performance payments or net metering credits | Lower monthly bills; faster savings |
| Local Grants | Municipal or county support for installations | Small grants that reduce final costs |
Selecting the Right Solar Equipment
Quality components determine long-term output and the true value of your install. Pick parts that match your roof layout and daily needs. A clear plan makes comparisons easier when you request quotes from a company.
Understanding Inverters
An inverter turns panel DC into usable AC power. Choose one that fits your roof layout and chosen array type.
String inverters work well on uniform roofs. Microinverters or optimizers help when shading or complex layouts reduce output.
The Role of Battery Storage
Adding a battery stores excess energy for evening use and outages. Make sure the battery integrates with your inverter and control system.
Tip: A compatible battery can improve savings by shifting electricity use and reducing peak charges.
Choosing High-Efficiency Panels
Select panels rated at least 450 watts for better power per square foot. Premium modules often carry longer warranties and lower degradation.
- Efficiency: Higher output means fewer panels on your roof.
- Warranty: Premium gear may protect your system 25–40 years.
- Value: Reliable equipment preserves electricity output and boosts resale value.
Choosing a Reliable Solar Installer
Picking the right installer is the single best way to protect your investment. A trusted solar installer ensures safe work, correct permits, and an efficient system that saves money over time.
Get at least three quotes from different companies. Compare price, equipment, warranty terms, and predicted electricity output. Ask for itemized estimates so you can compare apples to apples.
Look for certifications such as NABCEP and clear local references. Check online reviews and speak with nearby homeowners about workmanship and follow-up service.
- Confirm the company handles permitting and utility interconnection.
- Verify warranty coverage for panels, inverters, and labor.
- Ask how the installer measures expected energy and checks the roof first.
| What to Verify | Why it Matters | Red Flag |
|---|---|---|
| Certifications | Safer, compliant installation | No proof of training |
| Warranty | Protects your value and long-term output | Short or vague terms |
| Local references | Shows experience in your area | Few local projects |
“A quality installer turns a good design into reliable power and real savings.”
The Installation and Permitting Process
A typical installation journey involves paperwork, roof work, and final inspections that unlock grid connection. Expect the complete process of getting your solar energy system installed, including permits and final checks, to take between two and six months.
Local rules matter: some jurisdictions are faster, others require several agency approvals. Your chosen solar company will handle most filings and coordinate with the utility.
On-site work: Crews mount panels, wire the inverters, and connect the array to your meter. Safety and code compliance guide every step of the install on the roof and at the service panel.
What to Expect During Installation
- Permit submission and review by the building department.
- Physical installation: racking, panels, inverters, and wiring.
- Final inspection and utility interconnection for metering and activation.
Some regions use streamlined tools like SolarAPP that shorten permit review. Once the inspector signs off and the utility completes interconnection, net metering can begin and your bills may drop immediately.
| Stage | Typical Duration | Who Manages |
|---|---|---|
| Permit review | 1–8 weeks | Solar company / local office |
| Physical installation | 1–7 days | Installation crew |
| Inspection & interconnection | 1–6 weeks | Inspector / utility |
Final note: While the wait can last a few months, the long-term reward of clean energy and lower electricity bills makes the effort worthwhile for many homeowners.
Conclusion
A clear plan and trusted company make it possible to turn sunshine into steady, low-cost electricity. This guide helps you evaluate roof, pick efficient equipment, and weigh financing and incentives.
Take advantage of net metering and the federal tax credit to improve payback and boost long-term savings. Quality panels and routine maintenance keep your system productive and protect your investment.
Moving toward clean energy also cuts monthly electricity and lowers carbon output. Use the steps here, request detailed quotes, and choose a reputable installer for lasting value and real money savings.