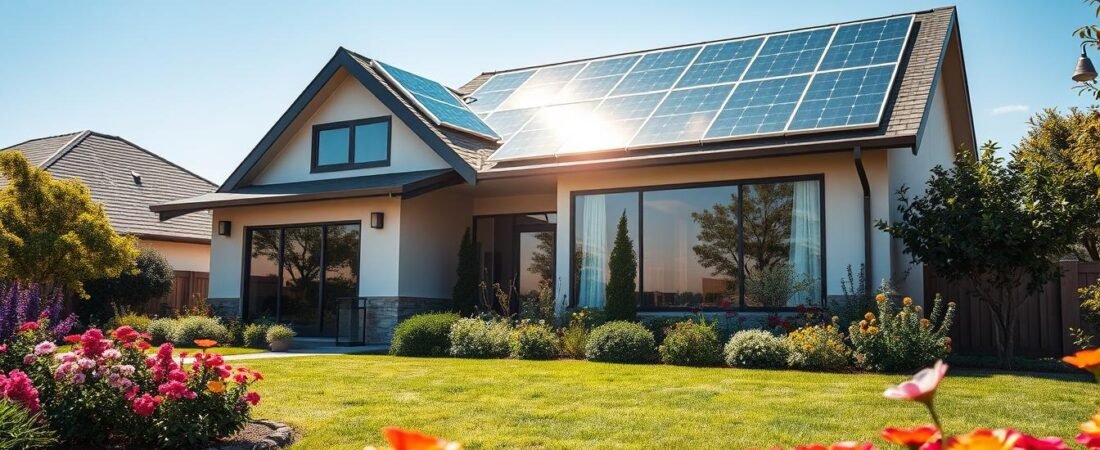
Choosing the right system for your home means balancing cost, performance, and warranty. The EnergySage 2026 Buyer’s Guide lists 2,037 models, so knowing what matters helps you cut through the noise.
Start with basics: check equipment quality, installer experience, and manufacturer ratings. Also look at per watt pricing — the national average is about $2.91 per watt — to set realistic expectations.
Think about long-term savings. A strong performance warranty and solid customer service protect your money and electricity yields. Local permits, tax incentives, and installer credentials like NABCEP affect final rates and timelines.
Our goal: give you clear options and simple ways to evaluate panels and systems so you can pick the best solar panel installation for your home with confidence.
Understanding Your Solar Energy Needs
Begin with a clear tally of your home’s monthly energy use. That number guides the correct system size and tells you how many solar panels you may need.
Decide early whether you want storage. A solar plus storage system lets you use stored electricity when the sun is down and cuts grid dependence.
- Check past utility bills to estimate daily and monthly electricity demand.
- Factor in roof orientation, shading, and annual sun exposure when sizing a system.
- Choose battery backup only if you want power after sunset or greater independence from the grid.
- Sending excess energy back to the grid can earn net metering credits if you don’t add storage.
“A properly sized system meets your home’s needs without overpaying for unused capacity.”
| Factor | Effect on Size | What to Check |
|---|---|---|
| Monthly electricity use | Directly determines kilowatt-hours needed | Utility bills for 12 months |
| Roof orientation & shade | Changes panel output | On-site shading analysis |
| Battery vs. no battery | Alters storage and grid reliance | Backup needs and net metering rules |
How to Compare Solar Panel Companies Effectively
Begin with the installer’s track record and how it handles post‑sale issues.
Assessing Installer Reputation
Check verified ratings and years in business. Look at third‑party reviews on platforms like EnergySage and the Better Business Bureau.
Local expertise matters. For example, Solar Alternatives in Jackson, MS, is an Expert Choice installer with several years of regional experience. South Coast Solar in Metairie, LA, holds 4+ star third‑party ratings from more than ten verified reviews.
Reviewing Customer Feedback
- Read how installers handle warranty claims and equipment issues.
- Ask for references and examples of completed residential installs.
- Demand transparent pricing and itemized quotes so you understand cost and savings.
“A reputable installer shows clear warranties and puts customer service first.”
| Factor | What to check | Why it matters |
|---|---|---|
| Ratings | Verified reviews | Shows real customer experience |
| Equipment & Warranty | Manufacturer and workmanship terms | Protects long‑term performance |
| Pricing | Detailed quotes | Avoids hidden costs |
For a deeper guide on how to compare solar panel companies, follow our linked checklist before you request quotes.
Key Differences Between Monocrystalline and Polycrystalline Panels
How panels are made changes their efficiency, cost, and fit for your home.
Monocrystalline panels use wafers cut from a single silicon crystal. That single‑crystal structure boosts efficiency and often yields higher energy output per square foot.
Polycrystalline panels are made by melting silicon fragments together. They usually cost less upfront and suit larger roofs where space is plentiful.
The choice affects your overall system size and long‑term yields. If roof space is limited, higher‑efficiency products deliver more energy in less area. For big roofs and tight budgets, lower‑cost options can still supply plenty of power.
- Monocrystalline: higher efficiency, premium cost, better for small roofs.
- Polycrystalline: lower cost, slightly lower efficiency, good for ample roof area.
- Both types last for decades and provide reliable energy for a home.
| Characteristic | Monocrystalline | Polycrystalline |
|---|---|---|
| Manufacture | Single crystal wafers | Melted silicon fragments |
| Efficiency | Higher output per sq. ft. | Moderate output, lower cost |
| Best fit | Small roofs, performance-focused systems | Large roofs, budget-conscious installs |
“Choosing the right cell type depends on your budget, roof space, and energy goals.”
Evaluating Solar Panel Efficiency and Performance
Efficiency and heat response determine how much usable electricity your rooftop will produce year-round. Efficiency ratings tell you how well equipment converts sunlight into electricity. High-rated products give more energy from less roof area.
The Role of Temperature Coefficients
Temperature makes a real difference. A lower temperature coefficient means a panel loses less output as it heats up. That matters most in hot states where midday heat can cut production.
- Maxeon 6 panels offer about 22.8% efficiency, so they deliver strong energy per watt on small roofs.
- REC Alpha Pure-RX panels feature a low temperature coefficient, so they keep output higher in heat.
- Most modern panels run roughly 15%–20% efficiency; higher numbers reduce the roof space and long-term cost.
| Feature | Typical Modern | Premium Options |
|---|---|---|
| Efficiency | 15%–20% | Maxeon 6 ≈ 22.8% |
| Temp coefficient | Standard drop in heat | REC Alpha Pure-RX: lower drop in hot climates |
| Best fit | Large roofs, lower cost | Small roofs, high output needs |
Always check equipment ratings and the manufacturer’s warranty before you choose. That step protects your performance and long-term savings.
Why Solar Panel Durability Matters for Your Roof
A rugged design keeps rooftop systems performing year after year. Durable solar panels face wind, hail, rain, and heavy snow without bending or cracking. That resistance protects your roof and keeps energy output steady.
Manufacturers run standardized tests like the Mechanical Stress Sequence to check how panels handle wind and snow loads. These tests help you pick equipment with proven strength.
Choose a quality system built to last 25 to 30 years. Lower degradation rates mean the panels maintain higher performance and reduce long‑term cost and hassle.
- Durability reduces repairs and the chance of roof damage during storms.
- Sturdy mounting hardware matters as much as the panel itself for roof protection.
- Look for strong warranties and positive customer ratings for real-world durability.
“A durable system not only preserves performance but also protects your home from premature wear.”
Decoding Solar Panel Warranties
Warranties tell you how makers back the long‑term value of your rooftop system. Read them closely to see what is covered, for how long, and any conditions that can void protection.
Two warranty types matter most: equipment coverage and performance guarantees. Equipment warranty covers physical defects, like manufacturing faults or premature wear from weather. Performance warranty promises a minimum level of electricity production over time.
Equipment Coverage Explained
Equipment warranties protect against broken cells, frame failures, and other defects. Some include labor and shipping, which can save money if a replacement is needed.
- What to check: length of coverage, workmanship inclusion, and exclusions for environmental damage.
- Practical tip: verify whether the installer or the manufacturer handles repairs.
Performance Guarantees
Performance guarantees limit how much your panels may degrade each year. They ensure your electricity output stays near the rated values so your long‑term savings hold up.
Standout fact: Maxeon offers a 40‑year product and performance warranty — 15 years longer than many industry norms. That can lower lifetime cost and risk.
“A solid warranty protects both equipment and expected energy production.”
| Warranty Type | What It Covers | Why It Matters |
|---|---|---|
| Equipment | Physical defects, sometimes labor/shipping | Reduces repair expense and downtime |
| Performance | Minimum electricity output over time | Protects expected savings and rates of return |
| Combined | Both product and output guarantees | Best protection when choosing long‑term options |
Analyzing the Cost of Solar Installations
Start your cost analysis by focusing on price per watt, not just the headline total. Converting quotes to dollars per watt makes it easy to judge value across different systems and equipment.
The U.S. average is about $2.91 per watt. Use that figure as a baseline, but expect variation based on equipment, roof complexity, and location.
When you total the project, include the panels, the inverter, labor, permits, and any mounting hardware. Those line items often drive the final cost more than the module price alone.
- Check per-watt pricing across quotes to spot true pricing differences.
- Factor in incentives such as federal tax credits and local rebates to lower your outlay.
- Ask for an itemized quote so you can see inverter, labor, and dealer or financing fees.
“Comparing cost per watt and incentives reveals which system gives the best long-term savings.”
| Cost Element | Typical Impact | What to Verify |
|---|---|---|
| Modules | Major upfront cost; affects performance | Efficiency, warranty, per-watt price |
| Inverter & Labor | Essential for operation; adds to install cost | Inverter type, workmanship warranty |
| Incentives | Can cut net cost substantially | Federal tax credit, local rebates |
Top Solar Panel Brands for Your Home
Start by narrowing brands that match your roof size and energy goals. That helps you pick between premium efficiency and value-driven options.
Premium Efficiency Options
Maxeon and REC
Maxeon leads in efficiency. Models like the Maxeon 6 reach about 22.8% efficiency, which is ideal for small roofs needing more output per square foot.
REC Alpha Pure-RX blends high performance with a competitive per watt cost, making it a common favorite among customers seeking strong long‑term yields.
Best Value Manufacturers
Canadian Solar and CW Energy
Canadian Solar offers well-rounded options that balance efficiency, warranty, and affordability for most homes.
CW Energy provides dependable equipment at lower cost, offering good performance for budget-focused homeowners.
American Made Selections
Silfab Solar
Silfab Solar manufactures high‑quality panels in Washington state. Homeowners who want to support American manufacturing often choose Silfab for its solid warranties and reputation.
“Each brand brings different strengths—choose based on roof space, budget, and desired warranty length.”
| Brand | Strength | Best For | Notable Feature |
|---|---|---|---|
| Maxeon | Highest efficiency | Small roofs, high output needs | Maxeon 6 ≈ 22.8% efficiency |
| REC | Performance vs. price | Balanced systems | Low temp coefficient, strong warranties |
| Canadian Solar | Value and reliability | Most homes | Good warranty and per-watt price |
| Silfab / CW Energy | Quality / value | Buyers wanting U.S. manufacturing / low cost | American-made option / cost-effective models |
- Consider warranty length, equipment ratings, and customer service when choosing.
- Decide if you value the best solar panel efficiency or the lowest upfront cost.
How to Vet a Local Solar Installer
Start by confirming that the installer holds recognized certifications and up‑to‑date licenses. NABCEP certification is the gold standard and shows real professional training. Ask to see certificates and license numbers before you schedule a site visit.
Check hands‑on experience. Ask how many residential solar panel systems they’ve installed and for examples of similar roof types in your state. Request recent customer references and call them.
A proper installer will inspect your roof before giving a quote. That on‑site check verifies roof condition, shade, and the size of the system you need.
Get at least three written quotes to compare per watt pricing, equipment options, warranties, and timelines. Clear communication about pricing and timeline shows good customer service.
- Verify NABCEP and local licensing.
- Confirm number of home installs and local references.
- Expect a roof inspection and an itemized quote.
“Vetting an installer carefully prevents surprises and ensures safe, efficient solar panel installation.”
The Importance of Professional Installation Credentials
Proper credentials matter as much as good equipment. Hiring a qualified crew reduces safety risks and helps protect your home’s investment.
Why NABCEP Certification Matters
NABCEP certification is the gold standard for a solar installer. It shows rigorous training, hands‑on experience, and a verified commitment to code‑compliant work.
Certified installers know how to handle complex electrical work and roof integrity. They follow local building codes and industry best practices. That lowers the chance of installation errors that hurt performance or void warranties.
“Choosing a certified installer is one of the best ways to ensure your system meets performance and warranty expectations.”
- Safety & quality: Certified crews reduce risk during installation and ensure proper equipment mounting.
- Warranty protection: Many top brands require certified installers to keep warranties valid.
- Faster troubleshooting: Trained pros resolve issues quickly, preserving long‑term performance.
- Local code compliance: Credentials help ensure permits and inspections pass smoothly.
| Credential | What It Shows | Benefit to Homeowner |
|---|---|---|
| NABCEP PV Installer | Formal training and field experience | Higher workmanship quality; often required by top equipment warranties |
| Licensed Electrician | Authorized to perform electrical connections | Safer tie‑in to the home electrical system; reduces code violations |
| Local Contractor License | Legal permission to work in jurisdiction | Smoother permitting and inspection process |
Navigating Solar Financing and Payment Options
How you fund your system determines whether you save the most money or spread costs over time. Paying cash for a panel system usually yields the lowest overall cost and the biggest lifetime savings on electricity.
If cash isn’t an option, financing choices let you go solar now and pay over time. Common paths include loans, leases, and power purchase agreements (PPAs).
Loans let you own the system while spreading the upfront cost. Look closely at interest rates and dealer fees so you know the true cost of the system over the loan term.
Leases and PPAs require little to no money down. You may get immediate bill relief, but you often do not own the equipment and may miss tax incentives tied to ownership.
- Weigh cash vs. credit: cash eliminates interest; loans add flexibility.
- Factor incentives: federal tax credits and state rebates reduce net cost regardless of payment method.
- Read the fine print: financing terms affect long‑term rates and total money saved.
“A reputable installer will walk you through options so your home switch to solar is both affordable and rewarding.”
What to Expect During the Solar Installation Process
Expect paperwork, waiting periods, and a short but active installation window on your roof. The full process usually takes about three months. Most of that time is for permits, inspections, and utility approvals.
On the ground, the rooftop work often takes about three days. Crews mount the solar panels, secure racking, and complete electrical wiring. The exact time depends on system size and roof complexity.
Your installer begins with an energy audit to size the system and finalize the design. After you approve the plan, the installer files permits and pulls required approvals for the solar panel installation.
- A city inspection verifies the solar panel system meets codes.
- The utility completes grid connection so you can send and use electricity.
- Weather and local permit timelines are common causes of delay.
“Good installers keep customers updated about time, permits, and final grid connection.”
| Stage | Typical Time | What to Watch |
|---|---|---|
| Design & Audit | 1–2 weeks | Confirm system size and equipment choices |
| Permits & Approvals | 4–8 weeks | Local government and utility reviews |
| Install & Inspection | 3 days to 1 week | Racking, panels, wiring, city inspection |
| Grid Connection | 1–2 weeks | Utility final sign-off to start generating electricity |
Tip: Ask your installer for a clear timeline and regular updates. That helps you plan for incentives, verify quotes, and track when savings begin. Understanding these steps makes the solar installation process smooth and predictable.
Conclusion
Making the right choice for your home’s renewable system begins with clear priorities.
Focus on three things: equipment quality, installer reputation, and total cost for the solar installation. High‑efficiency panels and a strong warranty protect output and returns for decades.
Always check an installer’s credentials and customer rating before you sign. Good credentials cut risk and help keep warranties valid.
Take time to research options and ask for itemized quotes. That effort helps you lower cost, boost savings, and support a more sustainable home energy future. We hope this guide made the choice clearer for your rooftop project.